Mix & Master
How to mix vocals in Logic Pro
A vocal usually needs the same few jobs in the same order: tuning, cleanup, level control, space, and riding the level so every word comes through. Logic Pro's own tools handle all of them. Keep the processing on the vocal track and the reverb and delay on sends, so you can change the space without touching the voice.
 Owen Hartley

Where to find it
Vocal channel strip and aux sends in the Mixer
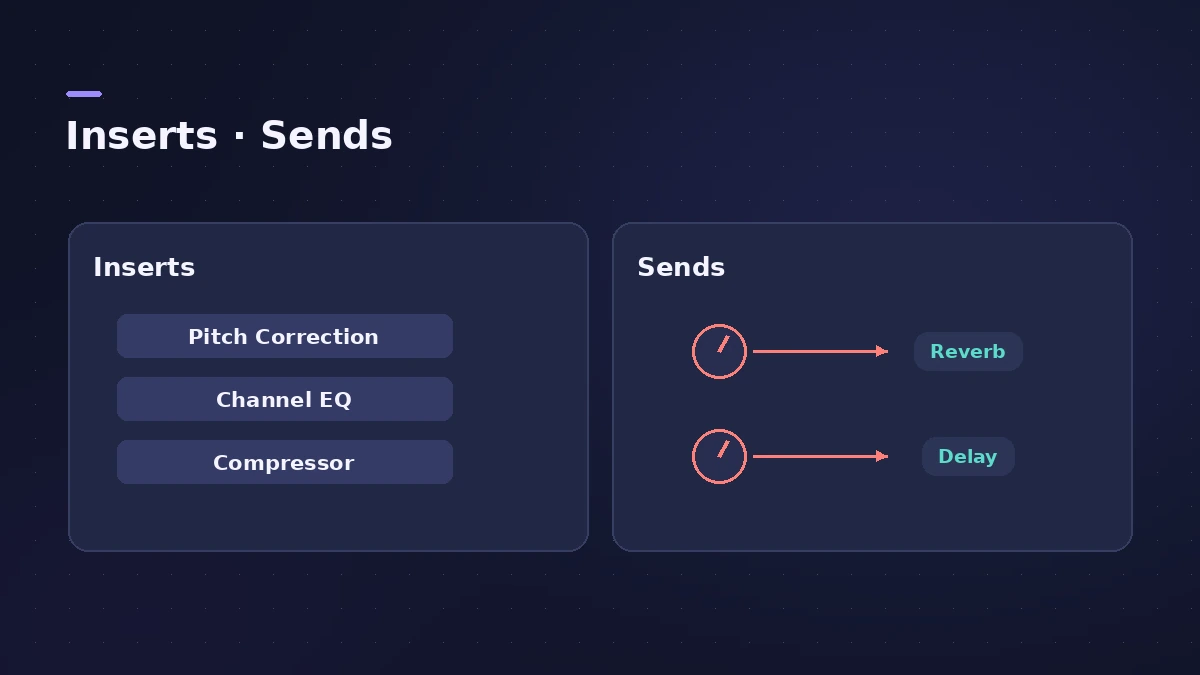
Vocal chain at a glance
| Slot | Plug-in | Job |
|---|---|---|
| Insert 1 | Pitch Correction (optional) | Tuning — or use Flex Pitch |
| Insert 2 | Channel EQ | High-pass and problem cuts — see Channel EQ |
| Insert 3 | Compressor | Even level |
| Send A | Reverb on an aux | Space — see aux sends |
| Send B | Delay on an aux | Depth and echoes |
For backing vocals, group them as described in Track Stacks.
Step by step
-
1
Tune first
Fix pitch with Flex Pitch or the Pitch Correction plug-in before you shape the tone — tuning changes how EQ and compression react.
-
2
Remove low rumble
Insert Channel EQ and switch on Band 1, the high-pass filter, to cut low frequencies the voice doesn't need. Use the Analyzer to see what's there.
-
3
Tame harsh or boomy spots
Use the parametric bands (3 to 6) to cut narrow problem areas you hear while the vocal plays in the mix.
-
4
Compress for even level
Add Compressor after the EQ. Set Threshold and Ratio until loud words come down; adjust Attack so consonants keep their bite.
-
5
Send to reverb and delay
Click a Send slot, choose a bus, and put the reverb or delay on the new aux channel. Raise the send knob to taste.
-
6
Ride the level with automation
Set the vocal track to Touch or Latch and move the fader while it plays to lift quiet words and tame loud lines.
Common mistakes
- Putting a long reverb directly on the vocal insert — you can't adjust its balance separately.
- Over-compressing with Auto Gain and RMS together; Apple warns this can oversaturate the signal.
- Tuning every note to perfect pitch so the vocal sounds robotic.
Stack the backing vocals
Put harmonies and doubles in a Summing Stack so they share one bus. You can then EQ, compress and automate the whole group with one channel strip and keep the lead vocal separate.
Sources
- Apple — Logic Pro X 10.1 Help: Flex Time and Pitch overview (old)
- Apple — Logic Pro User Guide: Channel EQ parameters in Logic Pro for Mac
- Apple — Logic Pro for iPad User Guide: Use Compressor
- Apple — Logic Pro for iPad User Guide: Compressor output parameters
- Apple — Logic Pro X 10.1 Help: Route audio via send effects (old)
- Apple — Logic Pro X 10.1 Help: Automation modes (old)
Checked November 2026. Logic ProFiles is independent of Apple; menu names can differ slightly between Logic Pro versions.
Frequently asked questions
What plug-ins should I use on vocals in Logic Pro?
+
A common stock chain is Channel EQ, Compressor and a reverb on a send. Add Pitch Correction or use Flex Pitch if the vocal needs tuning.
Should I EQ or compress vocals first?
+
Many engineers clean up with EQ first so the compressor doesn't react to rumble. Try both orders — Logic Pro lets you drag plug-ins between slots.
Related
- Live vocals in MainStageRun live vocals through MainStage: choose the mic input on an audio channel strip, add compression and DeEsser 2, and turn on feedback protection to mute howls.
- Pitch Correction plug-in in Logic ProAuto-tune vocals with Logic Pro's Pitch Correction plug-in: set Root and Scale, adjust Response for natural or hard tuning, bypass notes and use Global Tuning.
- Vocal Transformer in Logic ProUse Vocal Transformer in Logic Pro to shift a voice's pitch without changing its character, move formants for deep or tiny voices, double a vocal and Robotize.
- Exciter in Logic ProBrighten dull recordings with Logic Pro's Exciter: set the high-pass Frequency, the Harmonics amount, choose Color 1 or Color 2 and blend with the dry signal.
- Flex Pitch vs MelodyneFlex Pitch vs Melodyne: Logic Pro's free tuning handles single-note parts; Melodyne 5 ($99–$699) edits chords from Editor up and runs via ARA in Logic Pro.
- Stereo Delay in Logic ProUse Stereo Delay in Logic Pro: set delay, feedback and mix for each side, sync to tempo with note values, use crossfeed for ping-pong and filter the repeats.
- Tape Delay in Logic ProGet a vintage echo with Tape Delay in Logic Pro: sync to tempo, set feedback, choose Clean or Diffuse tape head, add flutter, LFO and tape saturation with Clip.
- DeEsser 2 in Logic ProReduce harsh S sounds with DeEsser 2 in Logic Pro: find the frequency with Channel EQ, choose Relative or Absolute mode, Split or Wide, and set Max Reduction.
- Autotune in Logic Pro — Flex Pitch and Pitch CorrectionTune vocals in Logic Pro without extra plug-ins: fix notes by hand with Flex Pitch, or use the Pitch Correction plug-in for real-time autotune. Both explained.
- How to use Channel EQ in Logic ProLearn Logic Pro's Channel EQ: the eight bands, the high-pass and shelving filters, the Analyzer, Q-Couple and HQ mode, plus a simple workflow for cleaner mixes.
- Aux sends and buses in Logic ProSet up aux sends in Logic Pro: send several tracks to one reverb on a bus, choose pre fader, post fader or post pan, and use Sends on Faders for headphones.
- Track Stacks in Logic Pro — folder vs summing stacksGroup tracks in Logic Pro with Track Stacks: when to use a Folder Stack or a Summing Stack, how to create, nest and open them, and why summing stacks are buses.